Hello, waffle enthusiasts! You’ve been yearning for those delightfully fluffy, flawlessly crisp waffles that taste as if a master chef made them, haven’t you? With the aid of the Krups Waffle Maker, we will now demonstrate how to produce this enchantment in your kitchen! The only prerequisite is a passion for all things waffle.
Krups has always been a respected brand in kitchen equipment, and their waffle maker is no exception. With its stylish appearance, reliable results, and user-friendly functions, it’s no surprise that this device has won the hearts of waffle lovers worldwide.
Whether you’re a seasoned waffle veteran or a newcomer to the beautiful world of waffle creation, we’ve got all the tips, tricks, and insider secrets you need to master the Krups Waffle Maker. Now, let’s roll up our sleeves and prepare to wow your taste buds with handmade waffles!
Instructions: How to Use the Krups Waffle Maker?
- Clear a level, firm surface in your kitchen to fit your Krups waffle maker and any other materials and equipment.
- Plug in and activate your Krups waffle maker. If appropriate, adjust the temperature control dial to the desired setting. While the appliance is heating up, the indication light will glow. Let the waffle maker to warm until the indication light shuts off or changes color, indicating that the correct cooking temperature has been attained.
- Prepare your waffle batter for your favorite recipe while the waffle machine preheats. Flour, eggs, milk, sugar, baking powder, salt, and melted butter or oil are basic ingredients in waffle batter. Stir the ingredients until uniform, but do not overmix.
- Before adding the batter, coat the hot waffle plates with cooking spray or a small coating of oil to avoid sticking.
- Using a ladle or measuring cup, gently pour the batter into the middle of the bottom plate of the waffle maker. Around two-thirds of the waffle plate should be filled, since the batter will expand when the lid is closed.
- Shut the cover of the waffle maker gently but firmly. The indication light may illuminate once more, indicating that the appliance is reheating in order to maintain the correct temperature. Let the waffle to cook for about 3 to 5 minutes, or until the indicator light shuts off or changes color, whichever occurs first. Cooking time might vary based on the consistency of the batter, the temperature setting, and the desired crispiness.
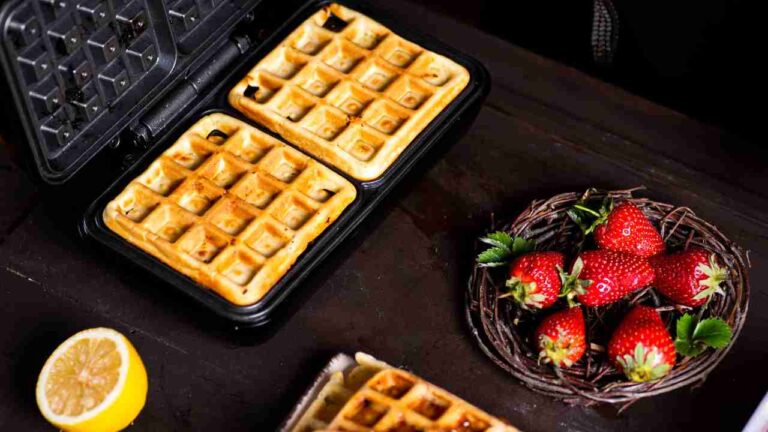
- As the indication light shuts off or changes color, open the lid gently to see the waffle’s development. The waffle’s outside should be golden brown and somewhat crunchy. Close the cover and let it to cook for an additional minute or two, if necessary.
- After the waffle is completely cooked, use a non-metallic spatula or tongs to carefully remove it from the waffle plates. Avoid using sharp or metallic utensils on waffle plates, since they might harm the non-stick coating.
- Serve the cooked waffle immediately with your preferred toppings, such as syrup, whipped cream, and fresh fruit. Keep the waffle maker closed and hot if you want to cook additional waffles.
- Once cooking is complete and the waffle maker has fully cooled, wipe the plates with a wet cloth or paper towel to remove any remaining batter or crumbs. Make certain the device is disconnected prior to cleaning it. If appropriate, see the user handbook for instructions on removing the plates for a more thorough cleaning.
What Do the Lights Mean on a Krups Waffle Maker?
On a Krups Waffle Maker, the lights, typically called indicator lights, serve as visual cues to help you navigate the waffle-making process. There are usually two indicator lights on the appliance:
- Power light: This light comes on when you plug in the waffle maker and switch it on, indicating that the appliance is receiving power and starting to heat up.
- Ready-to-cook light indicates that the waffle maker has reached the optimal cooking temperature. When you first turn on the appliance, this light will be off as the waffle maker heats up. Once it reaches the desired temperature, the ready-to-cook light will illuminate or change color, signaling it’s time to pour in the waffle batter.
During cooking, the ready-to-cook light may turn on and off as the appliance regulates its temperature. This is normal and ensures that your waffles are cooked evenly and consistently. Keep an eye on this light as a guide for when your waffles might be done, but also rely on visual cues, such as the waffles being golden brown and slightly crisp, to determine their readiness.
How Do You Know When a Krups Waffle Maker is Done?
- See the ready-to-cook indicator light, which illuminates when the waffle maker has achieved the correct cooking temperature. As the light shuts off or changes color, you should check the status of your waffle. Depending on the thickness of the batter, the temperature setting, and the desired crispiness, this normally takes between three and five minutes.
- When the waffle nears completion, the number of steam escapes from the waffle maker will substantially reduce. This indicates that most of the batter’s liquid has evaporated, and the waffle is almost done cooking.
- Check the waffle visually by lifting the waffle maker’s cover with care. The outside of a finished waffle should be golden brown and somewhat crunchy. Cover and simmer for another minute or two if it is still pale or undercooked.
How Much Batter Do You Put in the Krups Waffle Maker?
When using the Krups Waffle Maker, pouring enough batter to fill about two-thirds of the waffle plate is best. This usually amounts to approximately 1/2 to 3/4 cup of waffle batter, depending on the specific model of your waffle maker.
Since the batter will expand when you close the lid, leaving some space allows the waffle to rise without overflowing. You may need to adjust the amount slightly after the first waffle to find the perfect quantity for your specific mix and waffle maker.
Final words:
In conclusion, learning the Krups waffle maker is a breeze! With this step-by-step tutorial, you can quickly prepare scrumptious, golden-brown waffles. For excellent waffles, remember to warm your waffle maker, use the correct quantity of batter, and pay attention to the indication lights and steam decrease.

Whether it’s a weekend brunch with friends or a simple weekday breakfast, the Krups Waffle Maker is a dependable kitchen partner that makes your waffle fantasies come true. Hence, assemble your favorite toppings, invite your loved ones, and prepare to indulge in some fantastic handmade waffles. Happy waffle cooking!

- Texas Shaped Waffle Maker: Crafting State Pride on Your Plate - September 26, 2023
- Bubble Waffle Maker – Elevate Your Culinary Skills - September 26, 2023
- Tater Tot Waffle Toppings: Fun & Delicious Ideas for All! - August 7, 2023
